[Get the best value rain x headlight restoration kit on Amazon today!]
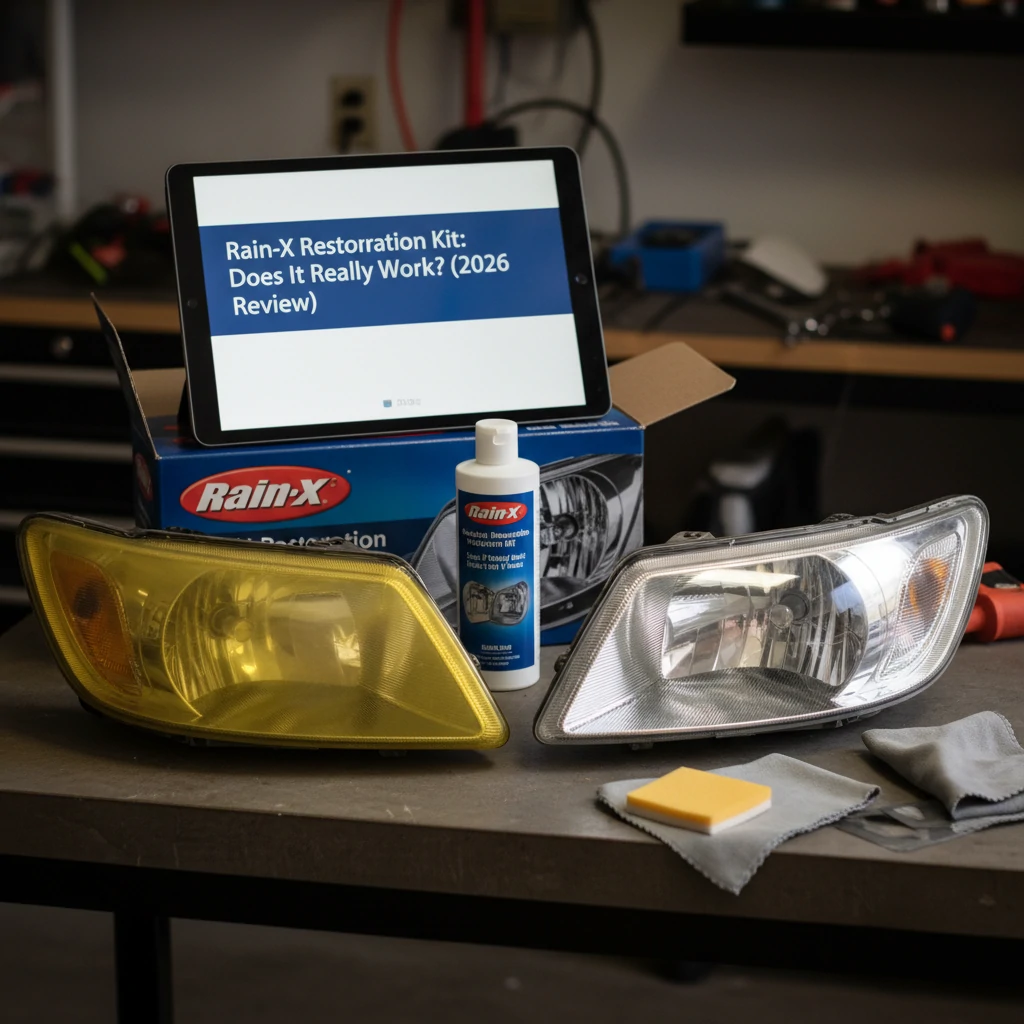
# Rain-X Headlight Restoration Kit: Does It Really Work? (2026 Review)
Let’s face it, foggy headlights are a real drag. Not only do they make your car look older and less appealing, but they also significantly reduce visibility, especially at night. That’s where headlight restoration kits come in, promising to bring back that crystal-clear shine. But with so many options on the market, it’s hard to know which ones actually deliver. The Rain-X Headlight Restoration Kit is one of the most popular and readily available options, but does it really live up to the hype?
In this 2026 review, we’ll take a deep dive into the Rain-X Headlight Restoration Kit. We’ll explore what it is, how it works, and most importantly, whether it actually works to restore your headlights to their former glory. We’ll cover the pros and cons, discuss the application process, and ultimately help you decide if this kit is the right solution for your foggy headlight woes. So, buckle up and let’s get started!
[Browse top-rated rain x headlight restoration kit on Amazon]
## The Problem: Why Are Your Headlights Foggy?
Before we dive into the Rain-X Headlight Restoration Kit, it’s important to understand why your headlights become foggy in the first place. The culprit is primarily oxidation caused by prolonged exposure to UV rays from the sun. Over time, the clear plastic lens of your headlights reacts with the UV radiation, leading to a hazy, yellowed appearance.
Think of it like this: your headlights are constantly bombarded by the sun’s rays, much like your skin. Just as sunscreen protects your skin from sunburn and long-term damage, the original factory coating on your headlights provides a similar layer of defense. However, this coating eventually wears away, leaving the plastic vulnerable to oxidation.
Other factors that contribute to foggy headlights include:
* **Road Debris:** Sand, rocks, and other debris can scratch the surface of your headlights, creating microscopic imperfections that scatter light and contribute to the hazy appearance.
* **Chemical Exposure:** Harsh chemicals from car washes, road salt, and even some cleaning products can damage the headlight lens over time.
* **Heat:** The heat generated by the headlight bulbs themselves can also accelerate the oxidation process.
Regardless of the specific cause, the result is the same: reduced visibility and a less-than-desirable appearance. And that’s where headlight restoration kits like the Rain-X Headlight Restoration Kit come in.
[Browse top-rated rain x headlight restoration kit on Amazon]
## The Solution: Rain-X Headlight Restoration Kit
The Rain-X Headlight Restoration Kit is designed to remove the oxidized layer of plastic from your headlights, revealing the clear, undamaged plastic underneath. It’s a multi-step process that involves sanding, polishing, and sealing the headlight lens to restore its clarity and protect it from future damage.
**How it Works:**
The kit typically includes several components:
* **Sanding Pads:** These pads, with varying grits, are used to remove the oxidized layer of plastic. The process starts with a coarser grit to remove the bulk of the damage and progresses to finer grits to smooth the surface.
* **Polish:** The polish is used after sanding to further refine the surface and restore clarity. It contains abrasive compounds that gently buff away any remaining imperfections.
* **Sealant:** The sealant is the final step in the process. It creates a protective layer on the headlight lens, shielding it from UV rays and preventing future oxidation.
**Key Features of the Rain-X Headlight Restoration Kit:**
* **Easy to Use:** The kit is designed for DIY application, with clear instructions that make the process relatively straightforward.
* **Affordable:** Compared to professional headlight restoration services, the Rain-X Headlight Restoration Kit is a significantly more budget-friendly option.
* **Readily Available:** You can find the Rain-X Headlight Restoration Kit at most auto parts stores and online retailers, making it easily accessible.
* **Claims to Improve Visibility:** Rain-X claims that the kit can improve headlight visibility by up to 200%, which can significantly enhance safety, especially at night.
**Does it Really Work?**
Now for the million-dollar question: does the Rain-X Headlight Restoration Kit actually work? The answer is…it depends. The effectiveness of the kit depends on several factors, including the severity of the oxidation, the application technique, and the specific kit being used (Rain-X offers several variations).
In general, the Rain-X Headlight Restoration Kit can be effective at removing light to moderate oxidation. It can restore clarity to headlights that are slightly hazy or yellowed, improving visibility and appearance. However, for headlights with severe oxidation, the kit may not be sufficient. In these cases, professional restoration or headlight replacement may be necessary.
**Here’s a breakdown of what you can expect:**
* **Pros:**
* Noticeable improvement in headlight clarity for light to moderate oxidation.
* Relatively easy to use for DIYers.
* More affordable than professional restoration or replacement.
* Can improve headlight visibility, enhancing safety.
* **Cons:**
* May not be effective for severe oxidation.
* Requires some elbow grease and attention to detail.
* Results may not be as long-lasting as professional restoration.
* Some kits may not include all the necessary tools (e.g., drill attachment).
**Recommended Rain-X Headlight Restoration Kit Products:**
1. **Rain-X Headlight Restoration Kit (Standard):** This is the basic kit and a good starting point for those with lightly oxidized headlights. It includes sanding pads, polish, and sealant.
2. **Rain-X Headlight Restoration Kit with Power Tool Attachment:** This kit includes a polishing pad that attaches to a drill, making the process faster and easier. This is ideal if you have a drill and want to save some time and effort.
3. **Rain-X Headlight Restoration Kit – Extra Strength:** For headlights with more significant oxidation, this extra-strength formula might provide better results. It typically includes more aggressive sanding pads and a more potent polish.
[Browse top-rated rain x headlight restoration kit on Amazon]
## Step-by-Step Guide: Restoring Your Headlights with Rain-X
Here’s a step-by-step guide to using the Rain-X Headlight Restoration Kit:
### Step 1: Preparation
* **Gather Your Supplies:** Make sure you have the Rain-X Headlight Restoration Kit, masking tape, water, and a clean microfiber cloth. If your kit requires a drill, ensure you have one ready.
* **Clean the Headlights:** Thoroughly clean the headlights with soap and water to remove any dirt or debris. Dry them completely.
* **Mask the Surrounding Area:** Use masking tape to protect the paint around the headlights. This will prevent accidental damage from the sanding pads.
### Step 2: Sanding
* **Start with the Coarsest Grit:** Begin with the coarsest grit sanding pad included in the kit. Wet the sanding pad and the headlight lens with water.
* **Sand in a Circular Motion:** Apply moderate pressure and sand the headlight lens in a circular motion. Work in small sections, overlapping each pass. Continue sanding until the entire surface is evenly sanded.
* **Repeat with Finer Grits:** Repeat the sanding process with each progressively finer grit sanding pad, wetting the pad and lens before each pass. This will gradually smooth the surface and remove any scratches left by the coarser grits.
### Step 3: Polishing
* **Apply Polish:** Apply a small amount of the included polish to the polishing pad (or the power tool attachment if you’re using one).
* **Polish the Headlight:** Polish the headlight lens in a circular motion, applying moderate pressure. If using a power tool, start with a low speed and gradually increase it as needed. Continue polishing until the surface is clear and glossy.
* **Wipe Away Residue:** Use a clean microfiber cloth to wipe away any remaining polish residue.
### Step 4: Sealing
* **Apply Sealant:** Apply a thin, even coat of the included sealant to the headlight lens. Follow the instructions on the sealant bottle for application and drying time.
* **Allow to Dry:** Allow the sealant to dry completely according to the manufacturer’s instructions. This will typically take several hours.
* **Remove Masking Tape:** Once the sealant is dry, carefully remove the masking tape.
### Step 5: Enjoy Your Restored Headlights!
* Step back and admire your work. You should notice a significant improvement in the clarity and appearance of your headlights.
[Browse top-rated rain x headlight restoration kit on Amazon]
## What to Look For in a Headlight Restoration Kit
If you’re considering purchasing a headlight restoration kit, here are some key factors to keep in mind:
* **Complete Kit:** Make sure the kit includes all the necessary components, including sanding pads of varying grits, polish, and sealant.
* **Ease of Use:** Look for a kit with clear and easy-to-follow instructions.
* **Power Tool Compatibility:** If you want to save time and effort, consider a kit that includes a power tool attachment for your drill.
* **UV Protection:** The sealant should provide adequate UV protection to prevent future oxidation.
* **Customer Reviews:** Read online reviews to get an idea of the kit’s effectiveness and ease of use.
[Browse top-rated rain x headlight restoration kit on Amazon]
## Pro-Tips and FAQs
* **Work in a Well-Ventilated Area:** Sanding and polishing can create dust and fumes, so it’s important to work in a well-ventilated area.
* **Don’t Skip Steps:** Each step
[Check the latest prices and deals for rain x headlight restoration kit on Amazon today!]