[Get the best value polishing pad for drill on Amazon today!]
# Polishing Pads for Drills: Which Type Is Best for Your Project?
Hey there! Ever tried to buff out a scratch on your car or give your furniture a fresh shine, only to end up with a swirl-filled mess? Yeah, been there! Choosing the right polishing pad for your drill can be a game-changer. It’s not just about slapping any old pad on your drill and hoping for the best. Different materials, shapes, and sizes are designed for specific tasks. In this guide, we’ll dive into the world of polishing pads for drills, breaking down the different types and helping you choose the perfect one for your next project. Let’s get started!
[Browse top-rated polishing pad for drill on Amazon]
## Understanding the Importance of Choosing the Right Polishing Pad
Using the correct **polishing pad for drill** is crucial for achieving professional-looking results. The wrong pad can cause damage, leave swirl marks, or simply not deliver the desired level of polish. It’s like using the wrong paintbrush for a painting – the right tools make all the difference. Understanding the different types of polishing pads and their intended uses will save you time, money, and a whole lot of frustration.
[Browse top-rated polishing pad for drill on Amazon]
## Types of Polishing Pads for Drills
Let’s explore the various types of polishing pads available for your drill. Each type has unique characteristics that make it suitable for specific applications.
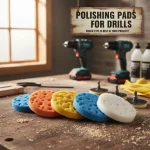
### Foam Polishing Pads
Foam pads are probably the most versatile and commonly used type of **polishing pad for drill**. They come in various densities and textures, each designed for a specific stage of the polishing process.
* **Cutting Pads:** These are the most aggressive foam pads, designed to remove scratches, oxidation, and other imperfections. They are typically made of a dense, coarse foam.
* **Polishing Pads:** These pads are less aggressive than cutting pads and are used to refine the surface after cutting. They remove swirl marks and leave a smooth finish.
* **Finishing Pads:** These are the softest foam pads, used for applying waxes, sealants, and glazes. They create a high-gloss finish and enhance the depth of color.
### Wool Polishing Pads
Wool pads are known for their aggressive cutting ability. They are ideal for removing heavy oxidation, scratches, and other severe imperfections. Wool pads are often used in automotive detailing and industrial applications.
* **Twisted Wool Pads:** These pads have a twisted wool fiber construction, which provides excellent cutting power and durability.
* **Blended Wool Pads:** These pads combine wool fibers with synthetic fibers, offering a balance of cutting power and finishing ability.
### Microfiber Polishing Pads
Microfiber pads are a relatively new addition to the polishing pad market. They offer a unique combination of cutting and finishing ability. Microfiber pads are gentle on surfaces and produce excellent results.
* **Cutting Microfiber Pads:** These pads have a dense microfiber construction, which provides excellent cutting power for removing scratches and imperfections.
* **Finishing Microfiber Pads:** These pads have a softer microfiber construction, designed for applying waxes, sealants, and glazes.
### Specialty Polishing Pads
In addition to the standard foam, wool, and microfiber pads, there are also specialty pads designed for specific applications.
* **Buffing Pads:** These pads are used to remove residue left behind by waxes and polishes. They are typically made of a soft, absorbent material.
* **Detailing Pads:** These small pads are designed for polishing tight spaces and intricate details. They are often used in automotive detailing.
* **Sanding Pads:** While not strictly polishing pads, sanding pads can be used with a drill to smooth rough surfaces and prepare them for polishing.
[Browse top-rated polishing pad for drill on Amazon]
## Choosing the Right Polishing Pad for Your Project
Selecting the right **polishing pad for drill** depends on the type of project you’re tackling and the condition of the surface you’re working on. Here’s a breakdown to help you make the best choice:
### For Automotive Detailing
* **Removing Scratches and Oxidation:** Start with a wool or cutting foam pad, followed by a polishing pad to refine the surface.
* **Applying Wax or Sealant:** Use a finishing foam or microfiber pad for a smooth, even application.
* **Polishing Headlights:** Opt for a dedicated headlight polishing kit with the appropriate pads and compounds.
### For Woodworking
* **Sanding and Smoothing:** Use sanding pads with varying grits to prepare the wood surface.
* **Applying Polish or Varnish:** Use a finishing foam pad for a smooth, even application.
* **Buffing Furniture:** Use a buffing pad to remove residue and enhance the shine.
### For Metal Polishing
* **Removing Rust and Corrosion:** Start with a wool or cutting foam pad, followed by a polishing pad to refine the surface.
* **Polishing Stainless Steel:** Use a polishing pad with a metal polishing compound for a mirror-like finish.
* **Polishing Jewelry:** Use small detailing pads with a jewelry polishing compound for intricate details.
### General Tips
* **Start with the Least Aggressive Pad:** It’s always better to start with a less aggressive pad and work your way up if needed. This will help prevent damage to the surface.
* **Use the Right Polishing Compound:** The polishing compound should be compatible with the pad and the surface you’re working on.
* **Keep the Pad Clean:** Clean the pad regularly to remove residue and prevent clogging.
[Browse top-rated polishing pad for drill on Amazon]
## Recommended Polishing Pads for Drills
Here are a few recommendations for **polishing pad for drill** that you can find on Amazon, along with their key features and why they’re great choices:
### Chemical Guys BUF_303_HEX6 6.5″ Hex-Logic Buffing Pad Kit
* **Key Features:** This kit includes a variety of foam pads for cutting, polishing, and finishing. The hex-logic design helps distribute product evenly and prevents overheating.
* **Why We Like It:** The Chemical Guys kit is a versatile option for automotive detailing. The different pads allow you to tackle a wide range of imperfections and achieve a professional-looking finish.
* **Amazon Link:** [Insert Amazon Affiliate Link Here]
### Adam’s Polishes Swirl Killer 5.5″ Microfiber Cutting Pad
* **Key Features:** This microfiber pad is designed for removing scratches and swirl marks. It’s gentle on surfaces and produces excellent results.
* **Why We Like It:** Adam’s Polishes microfiber pad is a great choice for those looking for a balance of cutting and finishing ability. It’s easy to use and produces consistent results.
* **Amazon Link:** [Insert Amazon Affiliate Link Here]
### Meguiar’s Soft Buff DA Foam Finishing Disc
* **Key Features:** This finishing foam pad is designed for applying waxes, sealants, and glazes. It creates a high-gloss finish and enhances the depth of color.
* **Why We Like It:** Meguiar’s finishing foam pad is a reliable option for achieving a show-car shine. It’s easy to use and produces consistent results.
* **Amazon Link:** [Insert Amazon Affiliate Link Here]
[Browse top-rated polishing pad for drill on Amazon]
## Step-by-Step Guide: Using Polishing Pads with Your Drill
Alright, let’s get down to the nitty-gritty. Here’s a step-by-step guide on how to use **polishing pads for drills** effectively.
### Step 1: Prepare the Surface
Before you start polishing, make sure the surface is clean and free of any loose dirt or debris. Wash the surface with soap and water, and dry it thoroughly. For automotive detailing, you may also want to clay bar the surface to remove any embedded contaminants.
### Step 2: Choose the Right Pad and Compound
Select the appropriate **polishing pad for drill** and polishing compound based on the type of project and the condition of the surface. Refer to the guidelines above for help.
### Step 3: Apply the Polishing Compound
Apply a small amount of polishing compound to the pad or the surface. Start with a small amount and add more as needed.
### Step 4: Start Polishing
Hold the drill at a slight angle to the surface and start polishing. Use a slow, even motion and overlap each pass by about 50%. Avoid applying too much pressure, as this can damage the surface.
### Step 5: Clean the Pad Regularly
Clean the pad regularly to remove residue and prevent clogging. You can use a pad cleaning brush or a microfiber towel to clean the pad.
### Step 6: Remove Residue
After polishing, remove any residue with a clean microfiber towel. Inspect the surface to ensure that you have achieved the desired level of polish.
### Step 7: Apply Wax or Sealant (Optional)
If desired, apply a wax or sealant to protect the surface and enhance the shine. Use a finishing foam or microfiber pad for a smooth, even application.
[Browse top-rated polishing pad for drill on Amazon]
## Pro-Tips for Polishing with a Drill
* **Practice on a Test Spot:** Before you start polishing, practice on a test spot to ensure that you are using the right pad and compound.
* **Keep the Pad Moist:** Keep the pad moist with water or a polishing lubricant to prevent it from drying out and causing damage.
* **Avoid Overheating:** Avoid overheating the surface by using a slow, even motion and avoiding applying too much pressure.
* **Work in a Well-Ventilated Area:** Work in a well-ventilated area to avoid inhaling harmful fumes from the polishing compound.
[Browse top-rated polishing pad for drill on Amazon]
## FAQ About Polishing Pads for Drills
**Q: Can I use any polishing pad with any drill?**
A
[Check the latest prices and deals for polishing pad for drill on Amazon today!]