1")
[Get the best value liquid wax on Amazon today!]
# Liquid Wax: The Ultimate Guide to a Flawless Finish (2026)
Are you dreaming of a showroom-worthy shine for your car, boat, or motorcycle? Achieving that flawless, head-turning finish might seem like a daunting task, but it doesn’t have to be! In this ultimate guide, we’ll dive deep into the world of **liquid wax**, revealing everything you need to know to get a professional-level gloss right in your own garage. Forget complicated processes and expensive detailing services – we’re breaking down the secrets to a stunning finish with **liquid wax** in 2026.
[Browse top-rated liquid wax on Amazon]
## Why Liquid Wax is Your Secret Weapon
For years, car enthusiasts have debated the merits of different types of waxes. But **liquid wax** has consistently risen to the top as a favorite for a few key reasons. Unlike paste waxes, which can be difficult to apply evenly and require significant buffing, **liquid wax** offers a smoother, more forgiving application. This means less effort for you and a reduced risk of swirl marks or uneven coverage.
But the benefits of **liquid wax** go beyond just ease of use. Modern formulations of **liquid wax** offer incredible protection against the elements, including UV rays, rain, road salt, and environmental contaminants. They also create a hydrophobic barrier, causing water to bead up and roll off your vehicle’s surface, making it easier to clean and maintain.
In short, **liquid wax** combines the protective qualities of traditional wax with the convenience and ease of application that busy car owners demand. It’s the perfect way to achieve a professional-looking shine without spending hours on detailing.
[Browse top-rated liquid wax on Amazon]
## Step-by-Step Guide to a Flawless Finish with Liquid Wax
Ready to transform your vehicle’s appearance? Follow these simple steps to achieve a flawless finish with **liquid wax**:
### Step 1: Wash and Decontaminate Your Vehicle
Before you even think about applying **liquid wax**, it’s crucial to start with a clean surface. This means thoroughly washing your vehicle to remove dirt, grime, and loose debris. Use a high-quality car wash soap and a microfiber wash mitt to avoid scratching the paint.
But washing alone isn’t enough. Over time, your vehicle’s paint accumulates contaminants like iron particles, tree sap, and road tar. These contaminants can prevent the **liquid wax** from bonding properly and can even cause damage to the paint over time.
To remove these contaminants, you’ll need to decontaminate your vehicle’s paint. There are two main methods for doing this:
* **Chemical Decontamination:** Use an iron remover spray to dissolve iron particles embedded in the paint. Follow the product’s instructions carefully.
* **Mechanical Decontamination:** Use a clay bar or clay mitt to physically remove contaminants from the paint surface. This method requires lubrication to prevent scratching.
After decontaminating, wash your vehicle again to remove any residue.
### Step 2: Dry Your Vehicle Completely
Once your vehicle is clean and decontaminated, it’s essential to dry it thoroughly before applying **liquid wax**. Any water left on the surface can interfere with the wax’s bonding process and can lead to streaks or water spots.
Use a microfiber drying towel to dry your vehicle. Start at the top and work your way down, blotting the water rather than wiping it to avoid scratching. You can also use a leaf blower or air compressor to blow water out of crevices and hard-to-reach areas.
### Step 3: Apply the Liquid Wax
Now comes the fun part: applying the **liquid wax**! Before you start, make sure you’re working in a shaded area or indoors to prevent the wax from drying too quickly.
Shake the **liquid wax** bottle well to ensure the ingredients are properly mixed. Apply a small amount of **liquid wax** to a microfiber applicator pad. A little goes a long way!
Using light, even pressure, apply the **liquid wax** to your vehicle’s paint in a thin, even layer. Work in small sections, overlapping each pass slightly to ensure complete coverage. Follow the product’s instructions regarding application method (circular or straight lines).
### Step 4: Allow the Liquid Wax to Cure
After applying the **liquid wax**, allow it to cure according to the manufacturer’s instructions. This typically involves waiting for a specific amount of time (usually 10-30 minutes) before buffing it off.
The curing process allows the **liquid wax** to bond to the paint and form a protective layer. Don’t skip this step!
### Step 5: Buff Off the Liquid Wax
Once the **liquid wax** has cured, it’s time to buff it off. Use a clean, dry microfiber towel to gently buff the surface, removing any excess wax and revealing the shine.
Use light, even pressure and work in small sections. Fold the microfiber towel frequently to expose a clean surface.
For best results, use a dual-action polisher with a microfiber buffing pad. This will help you remove the **liquid wax** more quickly and evenly, resulting in a deeper, more consistent shine.
### Step 6: Admire Your Flawless Finish!
Step back and admire your hard work! Your vehicle should now have a deep, glossy shine that will turn heads wherever you go.
[Browse top-rated liquid wax on Amazon]
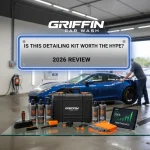
## Tools for the Job: Recommended Products
To achieve the best possible results with **liquid wax**, it’s important to use high-quality products. Here are a few of our top recommendations:
* **Meguiar’s Ultimate Liquid Wax:** This is a long-time favorite for its ease of use, durability, and impressive shine. It’s also safe for all paint types and clear coats. Its key feature is the ThinFilm technology, which makes application and removal incredibly easy, even in direct sunlight. This ensures a consistent and streak-free finish.
* **Chemical Guys Butter Wet Wax:** This **liquid wax** is known for its rich, buttery texture and its ability to create a deep, wet look. It’s also infused with natural carnauba wax for added protection and shine. Its key feature is its ability to enhance the depth and clarity of your paint, making it look like it’s been professionally detailed.
* **Griot’s Garage Best of Show Wax:** For those looking for the ultimate in protection and shine, Griot’s Garage Best of Show Wax is an excellent choice. This **liquid wax** is formulated with advanced polymers and carnauba wax for long-lasting protection and a show-stopping shine. Its key feature is its exceptional durability, providing protection against the elements for up to six months.
[Browse top-rated liquid wax on Amazon]
## Pro-Tips / FAQ Section
* **How often should I apply liquid wax?**
The frequency of **liquid wax** application depends on several factors, including the climate you live in, how often you drive your vehicle, and the type of **liquid wax** you’re using. In general, it’s a good idea to apply **liquid wax** every 3-6 months to maintain a good level of protection and shine.
* **Can I apply liquid wax to plastic trim?**
Some **liquid waxes** are safe to use on plastic trim, while others are not. Check the product label before applying **liquid wax** to plastic trim. If the label doesn’t specifically say that it’s safe for plastic, it’s best to avoid it.
* **What’s the difference between liquid wax and sealant?**
**Liquid wax** and sealant are both designed to protect your vehicle’s paint, but they work in different ways. **Liquid wax** is typically made from natural ingredients like carnauba wax, while sealant is made from synthetic polymers. Sealants generally offer longer-lasting protection than **liquid waxes**, but they may not provide the same level of shine.
* **Can I apply liquid wax in direct sunlight?**
It’s generally not recommended to apply **liquid wax** in direct sunlight, as the heat can cause the wax to dry too quickly, making it difficult to buff off. If you must apply **liquid wax** in direct sunlight, work in small sections and keep the surface cool.
* **What if I get liquid wax on my windows?**
If you accidentally get **liquid wax** on your windows, use a glass cleaner to remove it. You may need to apply the glass cleaner several times to completely remove the wax.
[Browse top-rated liquid wax on Amazon]
## Encouraging Conclusion
Achieving a flawless finish with **liquid wax** is easier than you might think! By following these simple steps and using high-quality products, you can transform your vehicle’s appearance and protect it from the elements. So, grab your **liquid wax**, roll up your sleeves, and get ready to experience the joy of a showroom-worthy shine. You’ve got this! You’ll be amazed at the difference it makes. Enjoy the process and the compliments that come with it!
[Check the latest prices and deals for liquid wax on Amazon today!]