1")
[Get the best value headlight polish on Amazon today!]
# How to Polish Headlights Like a Pro: A Step-by-Step Guide (2026)
Is your car starting to look a little…tired? Cloudy, yellowed headlights can instantly age a vehicle, and more importantly, they drastically reduce visibility, especially at night. But don’t worry, achieving crystal-clear headlights is easier than you think! This step-by-step guide will walk you through how to polish your headlights like a pro, restoring their shine and ensuring safer driving.
### Step 1: Gather Your Supplies
Before you dive in, you’ll want to make sure you have everything you need. This will save you time and frustration later on. Here’s a list of essential supplies:
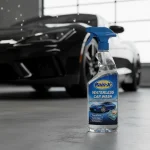
* **Headlight Polish:** This is the star of the show! We’ll talk more about choosing the right one later, but for now, just know you need a dedicated headlight polish.
* **Masking Tape:** This is crucial for protecting your car’s paint around the headlights.
* **Microfiber Towels:** You’ll need several clean microfiber towels for cleaning, polishing, and buffing.
* **Spray Bottle with Water:** For rinsing and cleaning.
* **Sandpaper (Various Grits):** This is only necessary for severely oxidized headlights. You’ll need a range of grits, typically from 400 to 3000.
* **Optional: Drill with Polishing Pad Attachment:** This can significantly speed up the polishing process, but it’s not essential.
* **UV Protectant:** This is a crucial final step to protect your freshly polished headlights from future oxidation.
### Step 2: Clean the Headlights
Before you even think about polishing, you need to thoroughly clean the headlights. Dirt, grime, and road debris will interfere with the polishing process and can even scratch the lens.
1. **Rinse the Headlights:** Start by rinsing the headlights with water to remove any loose dirt or debris.
2. **Wash with Soap and Water:** Use a mild soap and water solution to wash the headlights. You can use a car wash soap or even a dish soap.
3. **Dry Thoroughly:** Use a clean microfiber towel to dry the headlights completely.
### Step 3: Tape Off the Surrounding Area
This is a critical step to protect your car’s paint. Use masking tape to carefully tape off the area around the headlights. Make sure the tape is securely applied and covers all the paint that could potentially come into contact with the polish or sandpaper.
### Step 4: Sand the Headlights (If Necessary)
If your headlights are severely oxidized (yellowed, cloudy, and rough to the touch), you’ll need to sand them before polishing. This step removes the damaged outer layer of the lens.
1. **Wet Sand with 400 Grit Sandpaper:** Start with the coarsest grit sandpaper (400 grit) and wet sand the headlights in a back-and-forth motion. Keep the sandpaper and the headlight lens wet at all times. This will prevent the sandpaper from clogging and will help to remove the oxidation more effectively.
2. **Progress to Higher Grits:** After sanding with the 400 grit sandpaper, move on to the next higher grit (e.g., 600 grit), and repeat the process. Continue progressing through the grits (800, 1000, 1500, 2000, 2500, 3000), sanding with each grit until the scratches from the previous grit are removed. It’s vital to go through all the grits to achieve a smooth, clear surface.
3. **Rinse and Dry:** After sanding with the final grit, rinse the headlights thoroughly with water and dry them with a clean microfiber towel.
**Important Note:** If your headlights are only slightly oxidized, you may be able to skip this step and go straight to polishing.
### Step 5: Apply Headlight Polish
Now it’s time for the magic to happen!
1. **Apply Polish to a Microfiber Towel or Polishing Pad:** Apply a small amount of headlight polish to a clean microfiber towel or a polishing pad (if you’re using a drill).
2. **Polish the Headlights:** If you’re using a microfiber towel, rub the polish onto the headlights in a circular motion, applying firm pressure. If you’re using a drill with a polishing pad, start with a low speed and gradually increase the speed as needed. Keep the pad moving and avoid applying too much pressure.
3. **Continue Polishing:** Continue polishing until the headlights are clear and glossy. This may take several minutes per headlight.
4. **Remove Excess Polish:** Use a clean microfiber towel to remove any excess polish from the headlights.
### Step 6: Buff the Headlights
Buffing helps to remove any remaining residue and to further enhance the shine of the headlights.
1. **Use a Clean Microfiber Towel:** Use a clean, dry microfiber towel to buff the headlights in a circular motion.
2. **Apply Light Pressure:** Apply light pressure while buffing.
3. **Continue Buffing:** Continue buffing until the headlights are crystal clear.
### Step 7: Apply UV Protectant
This is the most crucial step to prevent the headlights from oxidizing again. The polishing process removes the original UV coating, leaving the plastic vulnerable to the sun’s harmful rays.
1. **Apply UV Protectant According to Instructions:** Follow the instructions on the UV protectant product. Most products are applied with a microfiber towel.
2. **Allow to Cure:** Allow the UV protectant to cure completely before exposing the headlights to the elements. This usually takes several hours.
[Browse top-rated headlight polish on Amazon]
## Tools for the Job
Choosing the right headlight polish can make a big difference in the final results. Here are a couple of recommended products:
* **Meguiar’s Headlight Restoration Kit:** This kit includes everything you need to restore your headlights, including sandpaper, polish, and a sealant. It’s a great option for severely oxidized headlights. The included drill attachment saves a lot of elbow grease.
* **Chemical Guys Headlight Restorer and Protectant:** This polish is designed to remove light oxidation and to protect the headlights from future damage. It’s a good option for headlights that are only slightly oxidized. The key feature here is the ease of application and the long-lasting UV protection.
[Browse top-rated headlight polish on Amazon]
## Pro-Tips / FAQ Section
* **How often should I polish my headlights?**
* The frequency of polishing depends on the climate and how often you drive. In general, you should polish your headlights every 6-12 months to maintain their clarity.
* **Can I use toothpaste to polish my headlights?**
* While toothpaste can work in a pinch, it’s not as effective as a dedicated headlight polish. Toothpaste is abrasive, but it doesn’t contain the specific ingredients needed to restore the clarity of the headlight lens.
* **What if my headlights are still cloudy after polishing?**
* If your headlights are still cloudy after polishing, it’s likely that the oxidation is too severe and you’ll need to replace the headlights.
* **Why do headlights oxidize in the first place?**
* Headlights are made of polycarbonate plastic, which is susceptible to oxidation from exposure to UV rays, heat, and chemicals.
[Browse top-rated headlight polish on Amazon]
## Encouraging Conclusion
Congratulations! You’ve successfully polished your headlights like a pro. Your car now looks newer, and you’ll enjoy improved visibility while driving at night. Remember to apply a UV protectant to prevent future oxidation, and you’ll be enjoying crystal-clear headlights for years to come. The process might seem a bit involved at first, but with a little patience and the right tools, you can easily restore your headlights to their former glory and enhance both the appearance and safety of your vehicle. Now get out there and enjoy the road!
[Check the latest prices and deals for headlight polish on Amazon today!]