[Get the best value headlight restoration 3m kit on Amazon today!]
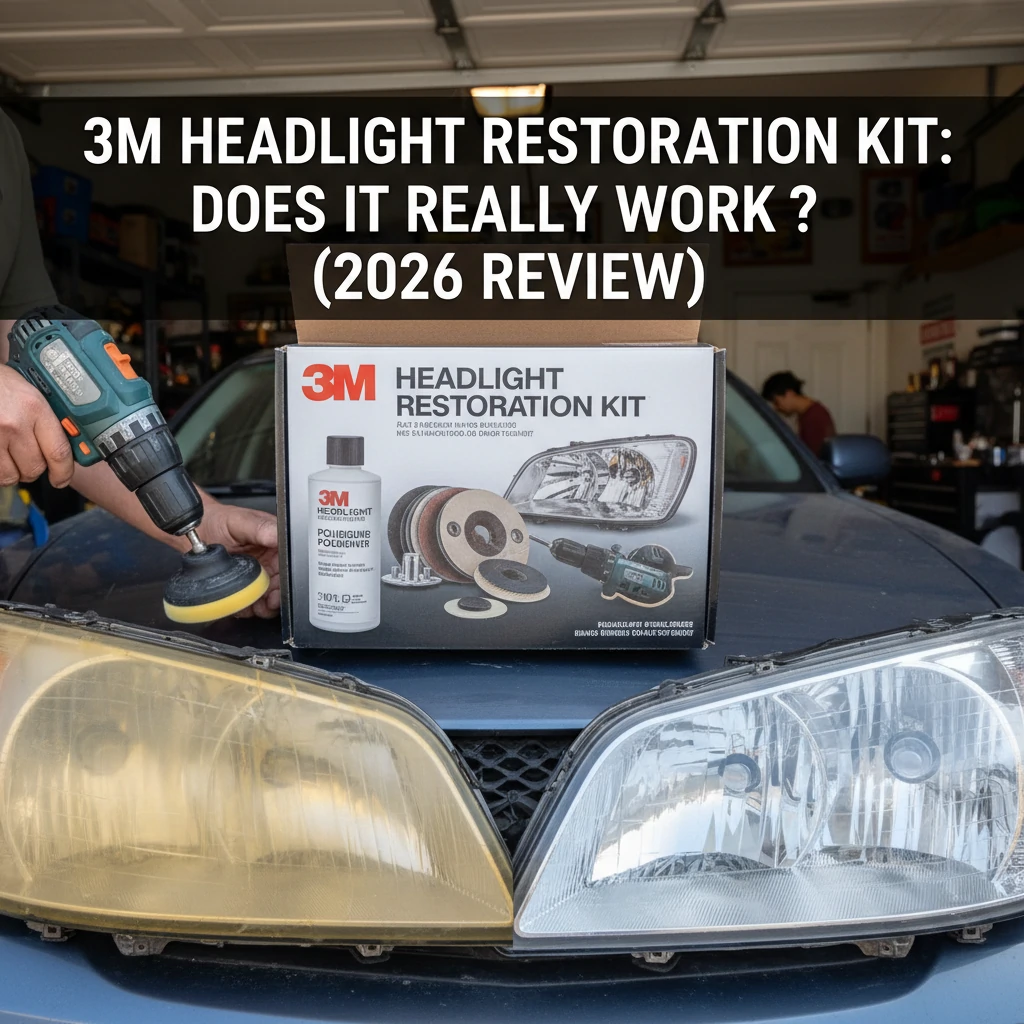
# 3M Headlight Restoration Kit: Does It Really Work? (2026 Review)
Cloudy, yellowed headlights are a real eyesore, not to mention a safety hazard. You’re here because you’re probably wondering if the 3M Headlight Restoration Kit can actually bring your headlights back to their former glory. The answer? Absolutely, but with a few caveats. In this 2026 review, we’ll dive deep into the 3M Headlight Restoration Kit, explore how it works, and whether it’s the right solution for your headlight woes. Let’s get started!
[Browse top-rated headlight restoration 3m kit on Amazon]
## The Problem with Cloudy Headlights
Why do headlights turn yellow and cloudy in the first place? It’s not just about age; it’s about oxidation. Headlights are typically made of polycarbonate plastic, which is strong and durable but susceptible to UV damage from the sun. Over time, this UV exposure causes the outer layer of the plastic to break down, leading to that hazy, yellowed appearance.
Road debris, chemicals, and even harsh washing detergents can also contribute to the problem. This oxidation not only makes your car look older and less appealing, but it also significantly reduces headlight brightness, making it harder to see at night and increasing the risk of accidents. Regular cleaning won’t solve this issue, as the problem is with the oxidized layer of plastic itself.
[Browse top-rated headlight restoration 3m kit on Amazon]
## The 3M Headlight Restoration Kit: The Solution?
The 3M Headlight Restoration Kit is designed to remove that oxidized layer of plastic, revealing the clear, undamaged plastic underneath. It essentially involves sanding away the damaged surface and then polishing the headlights to a crystal-clear finish. The core keyword, **headlight restoration 3m kit**, highlights the brand and purpose: a kit specifically designed by 3M to restore headlights.
The kit includes everything you need for the process (except a drill, which is highly recommended):
* **Sanding Discs:** Various grits for progressively removing the oxidation.
* **Trizact Disc:** A finer grit disc for refining the sanding marks.
* **Polishing Compound:** To restore clarity and shine.
* **Buffing Pad:** To apply the polishing compound.
* **Masking Tape:** To protect the surrounding paint.
* **Drill Attachment:** To hold the sanding and buffing pads.
* **Instructions:** A detailed guide on how to use the kit.
### How It Works: A Step-by-Step Guide
The 3M Headlight Restoration Kit works through a multi-step process:
1. **Preparation:** Thoroughly clean the headlight surface with soap and water. Dry completely.
2. **Masking:** Carefully tape off the area around the headlight to protect the paint from accidental sanding. Use the masking tape provided in the kit, ensuring full coverage.
3. **Sanding (500 Grit):** Attach the 500-grit sanding disc to the drill attachment. Apply even pressure and sand the entire headlight surface using overlapping strokes. Keep the surface wet by spraying it with water from a spray bottle. This step is crucial for removing the initial layer of oxidation.
4. **Sanding (800 Grit):** Switch to the 800-grit sanding disc and repeat the sanding process, again keeping the surface wet. This refines the sanding marks from the previous step.
5. **Sanding (3000 Grit Trizact):** Use the Trizact 3000-grit disc. This is the most important sanding disc for getting a clear finish. Sand the headlight, keeping it wet. This step removes the fine scratches left by the previous sanding steps.
6. **Polishing:** Apply a small amount of the polishing compound to the buffing pad. Attach the buffing pad to the drill attachment. Polish the headlight using moderate pressure and overlapping strokes. Continue polishing until the headlight is clear and glossy.
7. **Cleaning:** Wipe away any remaining polishing compound with a clean microfiber cloth.
8. **Protection:** While not included in the kit, consider applying a UV sealant or clear coat to protect the restored headlights from future oxidation.
### Tools for the Job: Recommended Products
While the 3M Headlight Restoration Kit provides most of the necessary tools, here are a few additional items that can make the process easier and more effective:
* **Cordless Drill:** A cordless drill with variable speed settings is essential for consistent sanding and polishing. A drill allows for more even pressure and control compared to sanding by hand. We recommend the **DEWALT 20V MAX Cordless Drill Combo Kit**. Its powerful motor and adjustable speed settings make it perfect for headlight restoration. Key features include a long-lasting battery, a comfortable grip, and a durable construction. Why we like it: It provides the necessary power and control for effective sanding and polishing, resulting in a professional-looking finish.
* **Spray Bottle:** A spray bottle filled with water is crucial for keeping the sanding discs and headlight surface wet during the sanding process. This prevents the sandpaper from clogging and helps to create a smoother finish. Key features include adjustable nozzle, durable construction, and easy grip. Why we like it: It provides a consistent and even spray of water, which is essential for achieving a smooth and clear headlight surface.
* **UV Protectant Clear Coat:** To keep your headlights from oxidizing again, it’s best to apply a UV protectant clear coat. This will provide a barrier against the sun’s harmful rays and keep your headlights looking clear for longer. We recommend **Meguiar’s Keep Clear Headlight Coating**. Key Features: UV protection, easy application, long-lasting results. Why we like it: It’s specifically formulated to protect headlights from yellowing and clouding, ensuring long-lasting clarity.
[Browse top-rated headlight restoration 3m kit on Amazon]
## Pro-Tips & FAQs
Here are some tips to help you get the best results with the 3M Headlight Restoration Kit:
* **Don’t Skip Steps:** Each sanding grit is important for achieving a smooth, clear finish. Skipping grits will result in visible scratches.
* **Keep the Surface Wet:** Water acts as a lubricant and helps to prevent the sandpaper from clogging.
* **Use Even Pressure:** Apply consistent pressure during sanding and polishing for uniform results.
* **Work in a Well-Ventilated Area:** The polishing compound can have a strong odor, so work in a well-ventilated area.
* **Protect Your Work:** Applying a UV sealant or clear coat after polishing will help to prevent future oxidation.
**FAQs:**
* **How long does the 3M Headlight Restoration Kit last?** The results can last for several months to a year, depending on the climate and how well the headlights are protected afterward. Applying a UV sealant or clear coat will significantly extend the lifespan of the restoration.
* **Can I use the kit on other plastic surfaces?** While the kit is designed for headlights, it can also be used on other clear plastic surfaces, such as taillights or motorcycle windscreens.
* **Is it safe to use on all types of headlights?** The kit is generally safe to use on most polycarbonate headlights. However, it’s always a good idea to test a small, inconspicuous area first to ensure compatibility.
* **What if my headlights are severely damaged?** Severely damaged headlights may require multiple applications of the kit or professional restoration services.
[Browse top-rated headlight restoration 3m kit on Amazon]
## Final Verdict: Does the 3M Headlight Restoration Kit Really Work?
Yes, the **headlight restoration 3m kit** absolutely works! It’s a cost-effective and relatively easy way to restore cloudy, yellowed headlights to their former glory. The key is to follow the instructions carefully and to use the recommended tools and techniques. While the process requires some effort, the results are well worth it. Not only will your car look better, but you’ll also enjoy improved visibility and safety on the road.
If you’re looking for a reliable and effective solution to restore your headlights, the 3M Headlight Restoration Kit is an excellent choice. Just remember to take your time, follow the instructions, and consider applying a UV sealant or clear coat for long-lasting results. Now go out there and make your headlights shine!
[Check the latest prices and deals for headlight restoration 3m kit on Amazon today!]